![]()
Radial Gutter Immobilizer
Absolute washable orthopedic Immobilizer for immobilization at meta-carpals and phalanges of the index and middle finger, leave the thumb, ring and pinky finger freely mobile.
INTENDED USE
- Distal Radius Fracture with/without Metacarpal Fracture
- Non-displaced second or third Metacarpal Fractures
- Non-displaced second or third Proximal Phalanx Fracture
FlexiOH Radial Gutter immobilizers are designed for immobilization of metacarpals and phalanges .It has an inbuilt soft cushioning padding which is very comfortable for skin contact. It is used to provide support for fingers injuries (ligament instability, sprain or muscle strain), fractures of the base of the first metacarpal (Rolando fracture/ Bennett’s fracture). HCP needs to apply it on the patient’s hand and then cure it with the RizyCure curing light device (recommended) for around 3-5 minutes depending on the size of immobilizer, until it gets rigid.
FlexiOH Radial Gutter Immobilizer comes in 3 different sizes: S, M and L. All of the immobilizers vary in terms of wrist circumference, forearm circumference and finger length. For the best fit of FlexiOH Radial gutter Immobilizer, taking the measurement of patient’s hand is necessary before application.
MEASUREMENT GUIDE
SIZE CHART (in cm)
| Size vs Measurement (Radial Gutter Immobilizer) |
Wrist Circumference: |
| S | 14-16 |
| M | 16-18 |
| L | 18-20 |
* Above sizes fit better as per dimensions mentioned in the table.
* However FlexiOH adapts to an oversize to a certain extend by stretch-ability.
* We advise healthcare professionals to choose the size as per patient’s comfort.
APPLICATION PROCESS
FlexiOH Radial Gutter Immobilizer application process is as follows:
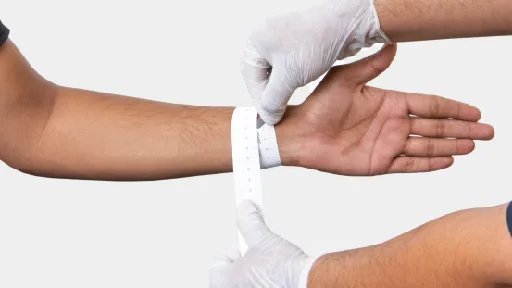
Step – 1 : Measure Wrist Circumference and choose size from size chart
Step – 2 : Open the product and inspect the product (In case any damaged, get it replaced)
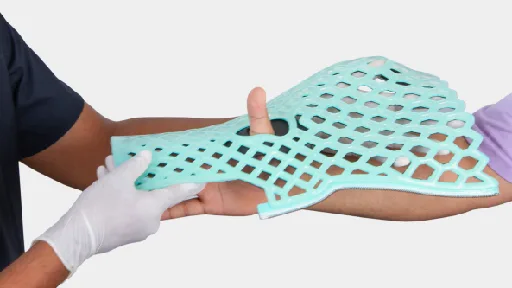
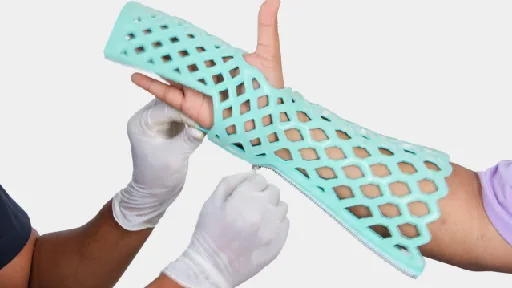
Step – 3 : Place immobilizer over the hand as shown in the image
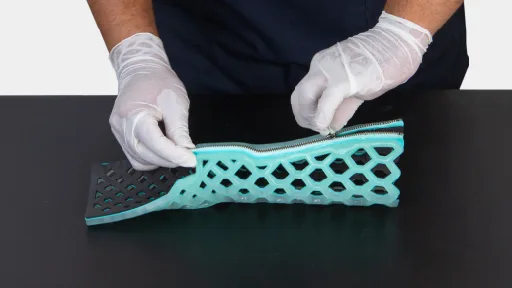
Step – 4 : Now, start the zipping process along the arm
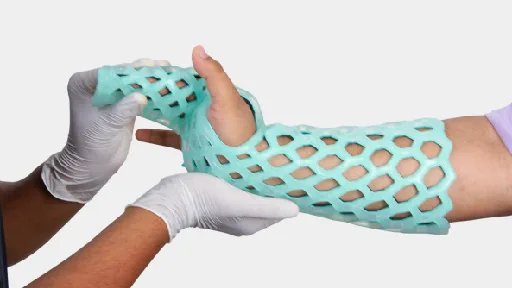
Step – 5 : Start reduction and position before curing process

Step – 6 : Take a RizyCure curing light device to start the curing process
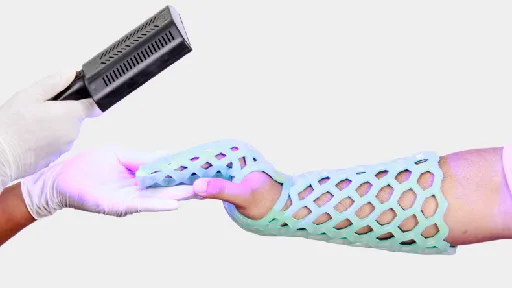
Step – 7 : Start curing around the thumb and palm area
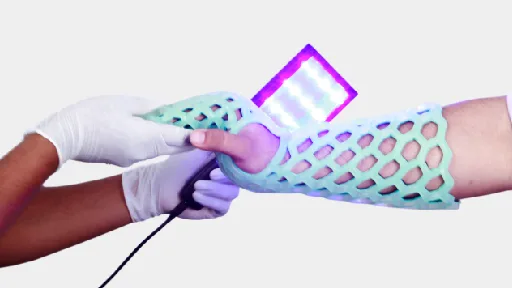
Step – 8 : Now cure the rest of the immobilizer for 3-5 minutes until gets rigid
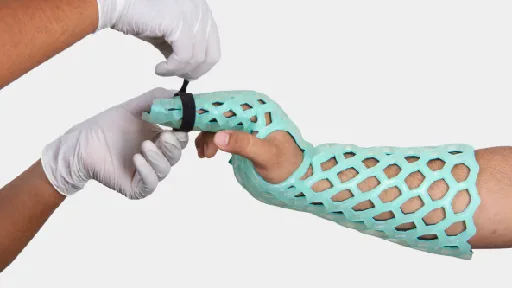
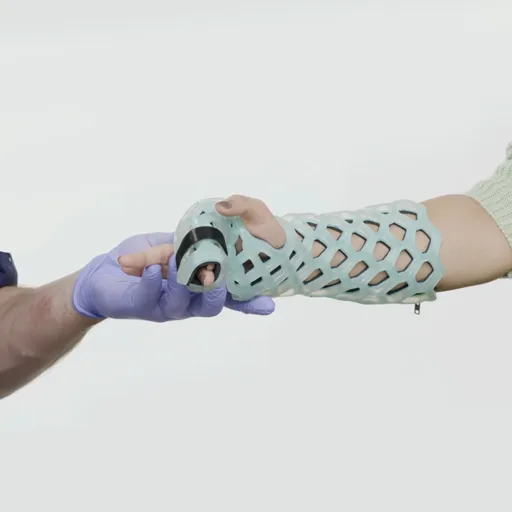
Step – 9 : After curing process apply the Velcro strap around the fingers
FlexiOH provide ~46 % open area of skin to breathe, wash, and exposure to sunlight which all are necessary to maintain healthy skin.
EASY REMOVAL PROCESS
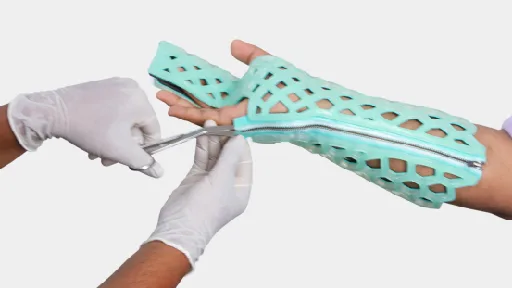
Removal Step – 1 : Cut the fabric of the zip along one of the side using blunt scissors
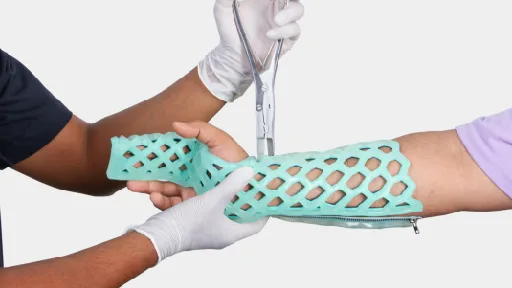
Removal Step – 2 : Use double action pliers to break the rib of the immobilizer in a straight line on the opposite side of zip line
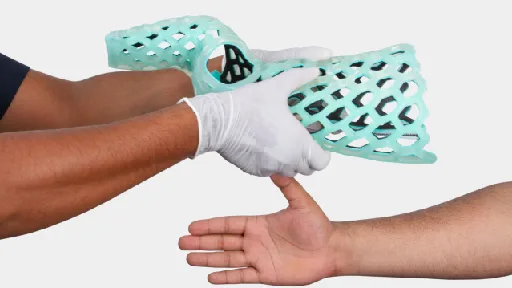
Removal Step – 3 : To remove immobilizer, apply gentle force and pull out from the immobilizer