![]()
Short Arm Immobilizer
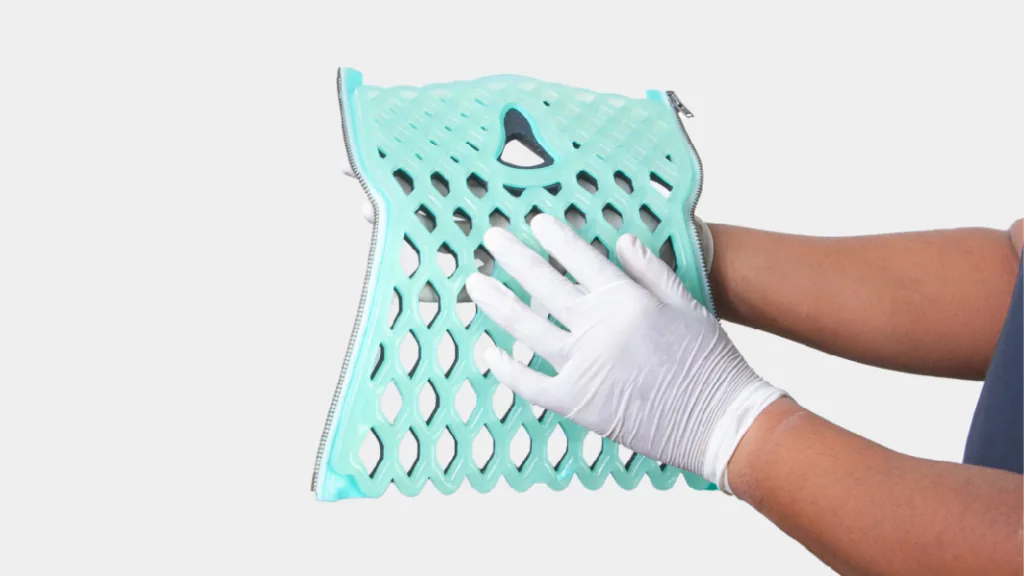
Absolute washable orthopedic Immobilizer for immobilization of wrist joint and closed fractures at radius-ulna.
INTENDED USE
- Non-displaced /
Stable /
minimally displaced /
Buckle fracture of distal radius fracture - Carpal bone fracture other than Scaphoid /
Trapezium
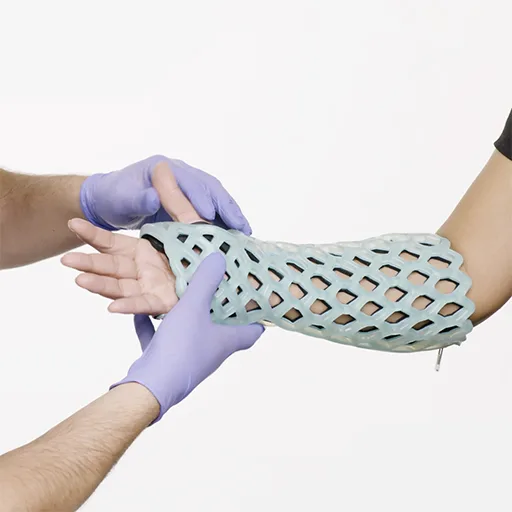
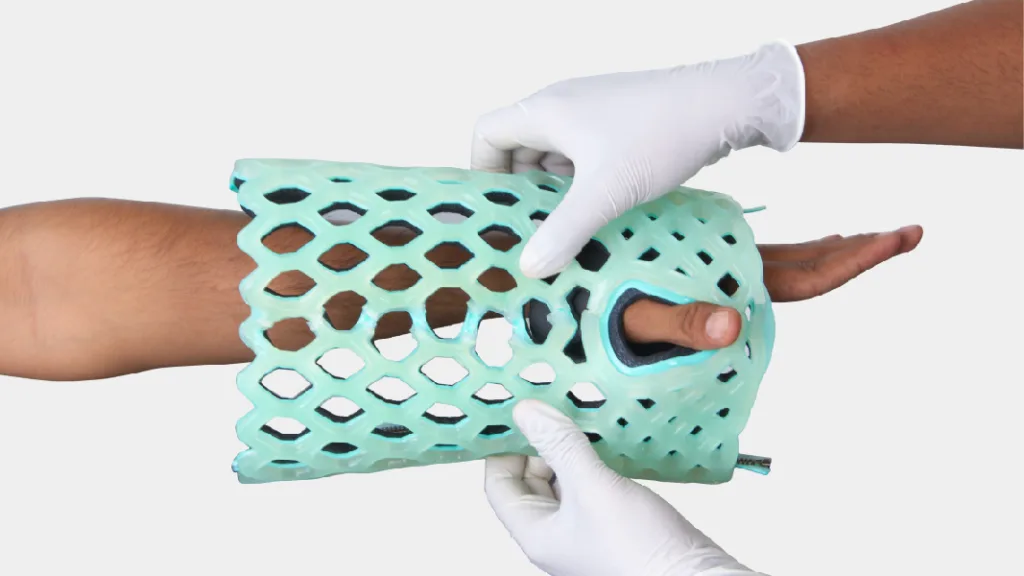
FlexiOH short arm immobilizers are designed for distal radius/non-displaced/stable fractures or carpal bone fractures other than scaphoid fractures. This breathable, washable and light weight (~300 gm) immobilizer provides better comfort to the patients compared to conventional casts. For application of FlexiOH short arm immobilizer, healthcare professional first need to apply it on the patient’s hand with the zip and then cure it with the RizyCure curing light device (recommended) for around 3-10 minutes depending on the size of immobilizer. Once it is rigid,cut the puller of the zip with pliers so that patient can not remove the immobilizer by themselves.
FlexiOH short arm immobilizer comes in 8 different sizes : XS, S, M, L, XL, SM, SL and SXL. All of the immobilizers vary in terms of palm circumference, wrist circumference, and arm circumference. For the best fit of FlexiOH short arm immobilizer, taking the measurement of patient’s hand is necessary before application.
MEASUREMENT GUIDE
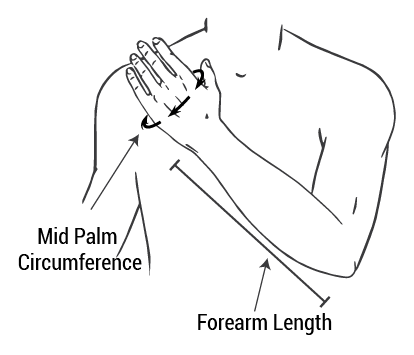
SIZE CHART (in cm)
| Size vs Measurement (Short Arm Cast) |
Mid-Palm Circumference: | Forearm Length: |
| XS | 11-14 | 18-21 |
| S | 14-17 | 23-26 |
| M | 17-18.5 | 26-29 |
| L | 18.5-22.5 | 29-30 |
| XL | 22.5-24.5 | 30-33 |
| SM | 17-18.5 | 23-27 |
| SL | 18.5-22.5 | 27-29 |
| SXL | 22.5-24.5 | 29-30 |
* Above sizes fit better as per dimensions mentioned in the table.
* However FlexiOH adapts to an oversize to certain extend by stretch-ability.
* We advise the healthcare professionals to choose the size as per patient’s comfort.
APPLICATION PROCESS
FlexiOH Short arm immobilizer application process is as follows:

Step – 1 : Measure the Mid-Palm Circumference

Step – 2 : Measure the Forearm Length and choose the appropriate size from size chart
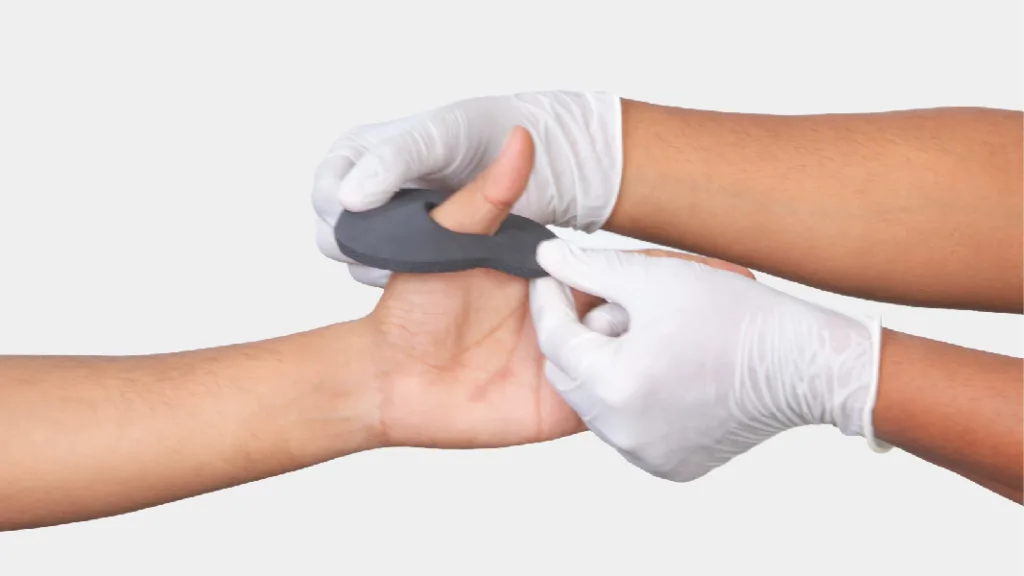
Step – 3 : Apply cushioning to thumb to give extra comfort to pressure points
Step – 4 : Inspect the product (In case any damaged, get it replaced )

Step – 5 : Place immobilizer over the fractured hand anchoring thumb

Step – 6 : Lock the zip by placing insertion pin into retainer box

Step – 7 : Pull the puller of the zip until the end
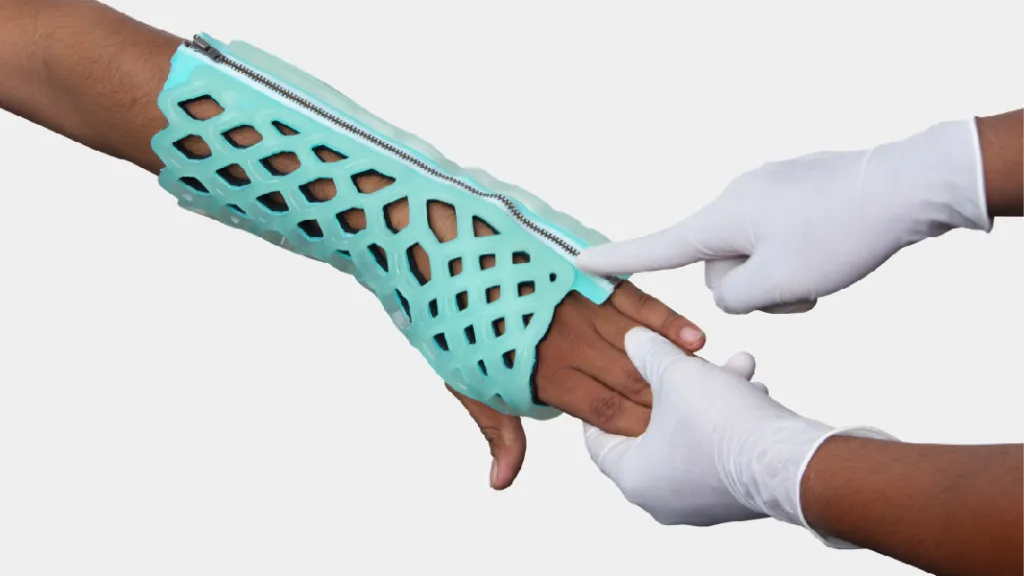
Step – 8 : Keep zip in straight line before curing

Step – 9 : As it adapts to the shape of the hand, start reduction process
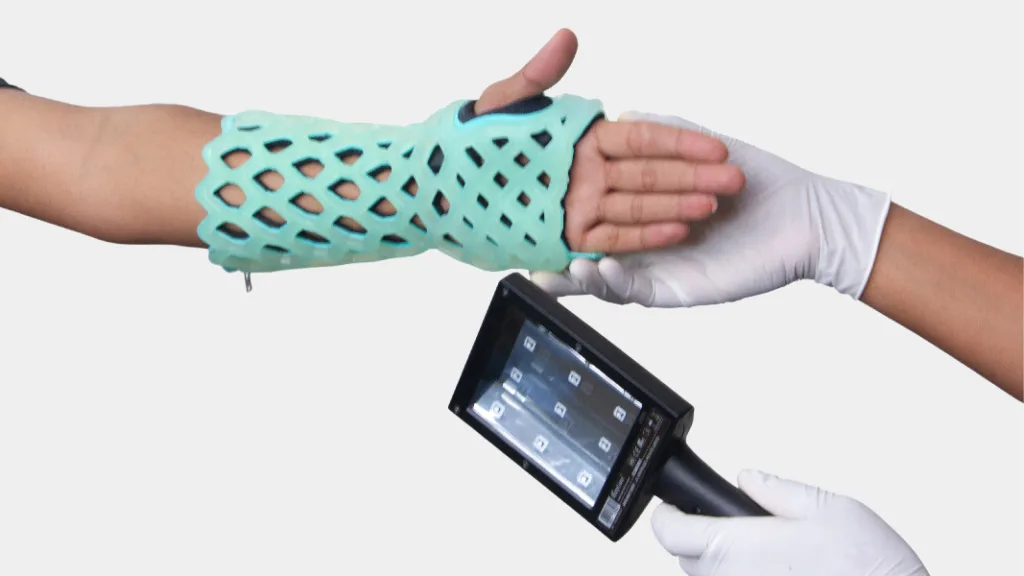
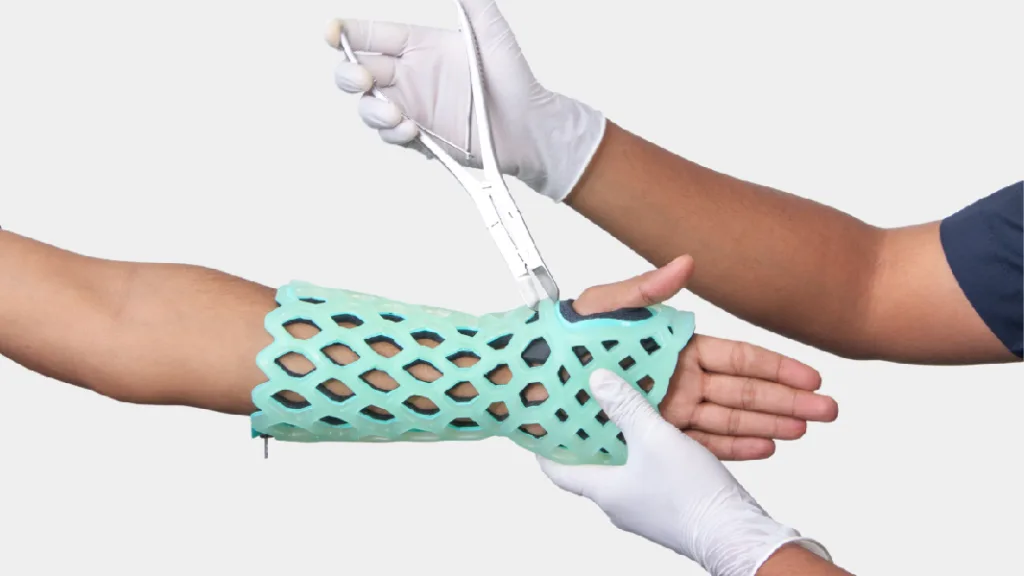
Step – 10 : Take a RizyCure® Curing Light Device

Step – 11 : Start curing around the thumb to give initial support to the broken bone
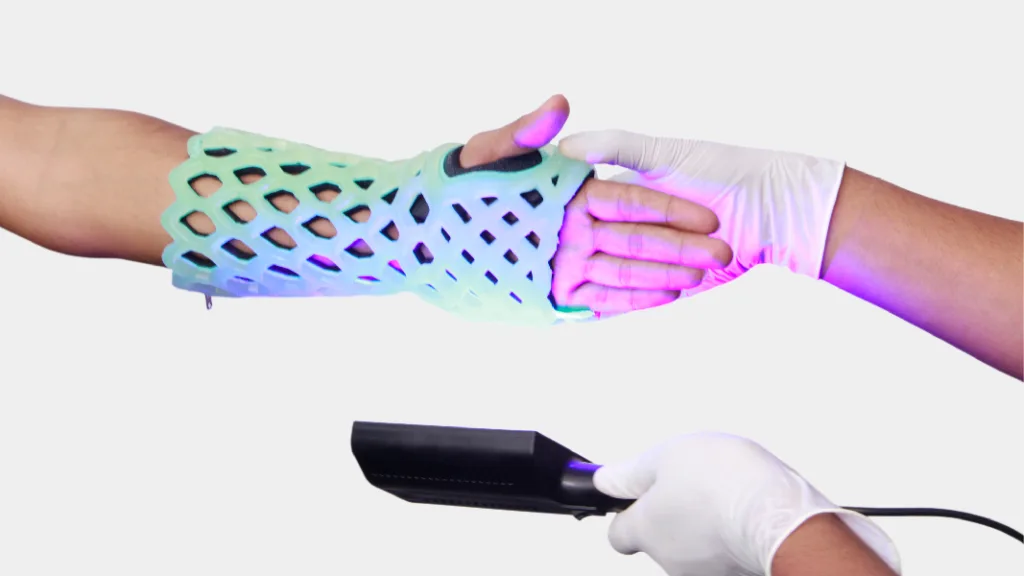
Step – 12 : Expose 3-5 minutes thoroughly and check every corner until it’s hardened
FlexiOH provide ~46 % open area of skin to breathe, wash, and exposure to sunlight which all are necessary to maintain healthy skin.
EASY REMOVAL PROCESS
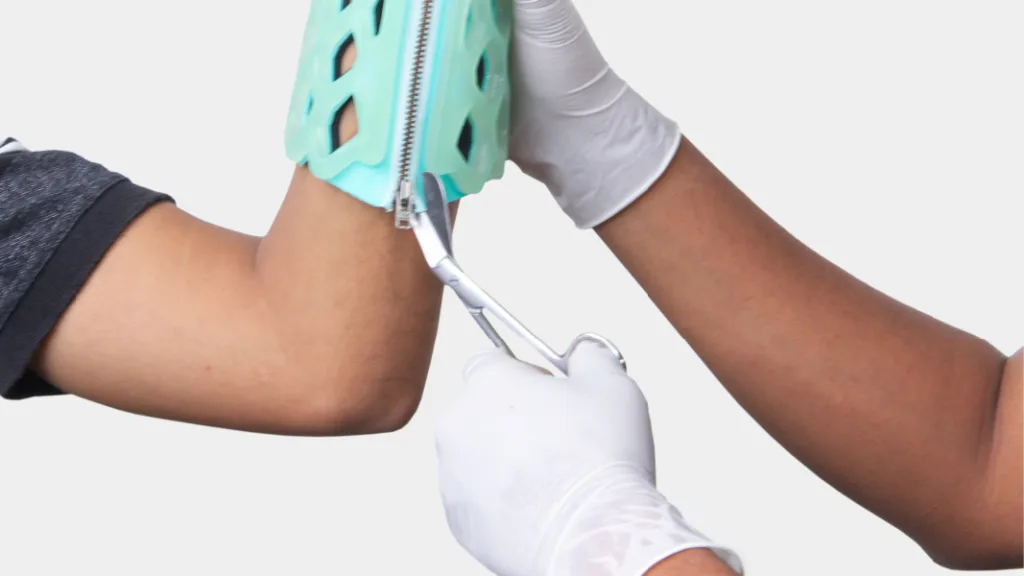
Removal Step – 1 : Cut the fabric of the zip along one of the side using blunt scissors
Removal Step – 2 : Use double action pliers to break the rib of the immobilizer in a straight line on the opposite side of zip line
Removal Step – 3 : To remove immobilizer, apply gentle force and pull out from the immobilizer